
I once watched a homeowner pay a tile setter to tear out a freshly finished bathroom floor because the plumber had not roughed in the shower drain yet. The tile went down beautiful, then came back up two days later in a pile of broken pieces. That mistake cost about $1,800 in redone labor and materials, and it happened for one reason: the trades got scheduled in the wrong order.
When you run your own remodel, sequencing is the part nobody warns you about. You can hire great people and still lose weeks because the drywaller showed up before the electrician finished, or the painter came in before the trim carpenter. The order matters as much as the price.
I have priced thousands of jobs, and the projects that stay on budget almost always share the same skeleton underneath. Here is how I sequence trades so they do not trip over each other.
Lock Down Permits and the Full Scope Before Anyone Swings a Hammer
Sequencing starts before demolition. If you have not pulled permits and finalized your scope, every trade that follows is guessing.
Inspectors want to see rough work in a specific order, and skipping that gets you red-tagged. A red tag means a trade stops, waits, and often bills you again to come back. Budget for this early. Depending on your city and project size, expect remodel permit costs to land somewhere around $500 to $2,500, sometimes more for structural work.
Walk every room with a notepad and lock down finishes, fixtures, and appliance dimensions before demo day. A cabinet that arrives 2 inches deeper than planned can move your whole electrical layout, and that ripple costs money.
One more honest note: decide who is actually running this job. If you are self-managing, you become the scheduler, the buffer, and the person who eats the cost of a mistake. The general contractor versus DIY tradeoff is real, and a lot of owners underestimate how much of the value a GC adds is just sequencing trades correctly.
Demolition and Structural Work Come Next
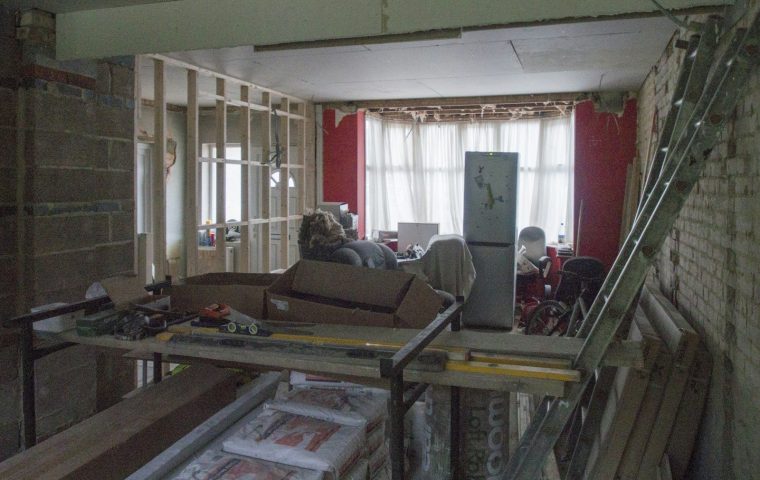
Once permits are in hand, demo leads. Tear out what is leaving, haul the debris, and expose the bones of the space.
Do structural changes while the walls are open: moving a load-bearing wall, adding a beam, reframing a doorway. This is the moment to find surprises, and you will find some. Rot, old knob-and-tube wiring, a drain line that runs where you wanted a wall to go.
Set aside a contingency of 10 to 20 percent of your budget for what demo uncovers. On a kitchen, that can mean an extra $3,000 to $8,000 for things nobody could see until the walls came down. Owners who skip this line item are the ones who run out of cash at 70 percent done.
Rough-In the Trades in the Right Order
This is the heart of sequencing. The rough-in stage is where plumbing, electrical, and HVAC all need to happen inside open walls, and they have to go in a sensible order.
Plumbing first, then HVAC, then electrical
Plumbing and HVAC move the biggest, least flexible things: drain lines, vent stacks, and ductwork. Those need the prime real estate inside your walls and floors. Wire bends around a duct far easier than a duct bends around wire.
So I run plumbing rough-in first, HVAC second, and electrical last among the three. The electrician can thread wire around whatever the other two already placed. Reverse that order and you will pay an electrician to reroute circuits, which on a mid-size remodel can add $600 to $1,500 of avoidable labor.
Get inspections before you close anything
Call for your rough-in inspections now, while everything is visible. Inspectors sign off on the framing, plumbing, and electrical before insulation hides it. If you insulate or drywall first, you may be tearing it back open. I have seen owners cover a wall on a Friday and demo it Monday because they forgot the rough electrical sign-off.
Close the Walls: Insulation, Drywall, and Paint
With inspections passed, you can finally close up. Insulation goes in, then drywall, then taping and mud.
Here is a sequencing trick that saves real money: get your first coat of paint, the primer and one finish coat, on the walls before flooring and cabinets arrive. Painters work fast and messy in an empty room. Once finished floors and cabinets are in, every drop and splatter becomes a careful, slow, expensive cleanup.
Drywall, then prime and paint walls, then flooring, then cabinets, then final paint touch-up. Painting twice (rough coat early, touch-up at the end) sounds wasteful but it is cheaper than protecting finished surfaces from a full paint job.
Set the Finishes: Flooring, Cabinets, Counters, and Trim
Now the room starts to look like something. The order here is specific, and getting it wrong is how that tile floor I mentioned earlier ended up in the dumpster.
- Flooring goes down first in most rooms so cabinets sit on a finished surface (though some pros set kitchen cabinets first; confirm with your installer).
- Cabinets get installed and leveled.
- Countertops get templated only after cabinets are set, because the template has to match the real boxes, not the plan. This means a gap of one to two weeks while the counter is fabricated.
- Trim, doors, and millwork go in around the finished surfaces.
That countertop gap surprises people every time. You cannot template granite or quartz until the cabinets are physically there, so plan your schedule around that dead week. A full kitchen remodel cost often runs from roughly $25,000 to $60,000, and a big slice of any overrun traces back to finishes ordered or measured out of sequence.
Finish Trades and the Punch List
The last trades through are the ones who connect and test what everyone else installed. Electricians return to set fixtures, switches, and outlet covers. Plumbers come back to mount faucets, toilets, and sinks. This is called the trim-out, and it should be near the very end.
Then comes the punch list: the caulk line that is uneven, the cabinet door that needs adjusting, the outlet that is loose. Walk the whole job with a critical eye and a flashlight. Hold back final payment until the punch list is genuinely done, because a contractor who is fully paid moves slower than one who is not.
Do not let the flooring crew and the cabinet crew show up the same day. They will fight over the same square footage, slow each other down, and the cabinet installer may walk and reschedule you a week out. One trade, one zone, one day.
A Simple Rule for Sequencing Anything
When you are unsure which trade goes first, ask one question: does this work get hidden or covered by the next step? If yes, it goes earlier. Rough plumbing hides behind drywall, so it goes before drywall. Wall paint hides behind nothing, so it can wait until the messy work is done.
Work from the inside out and from rough to finish. The bones get buried, the skin goes on last, and nobody redoes work because they got the order backward.
Can I overlap trades to finish faster?
Some, but carefully. You can have an electrician and a plumber rough-in the same week in different zones, but never stack two trades fighting for the same wall or floor on the same day. Overlapping the wrong pair usually costs you more time than it saves.
How far ahead should I schedule each trade?
Book your key trades three to six weeks out and confirm two days before. Good electricians, plumbers, and counter fabricators stay busy, and a no-show in the middle of your sequence stalls everyone downstream of them.
What is the single most expensive sequencing mistake?
Installing finished surfaces (flooring, tile, cabinets) before the rough-in and inspections are signed off. Redoing finished work means paying for the same materials and labor twice, which can add thousands to a single room.
Sequencing is not glamorous, but it is where self-managed remodels are won or lost. Get the order right, leave a contingency for what demo uncovers, and hold your trades to one zone at a time. Do that, and the job comes in close to budget instead of weeks late with a dumpster full of work you paid for twice. I will see you on the punch list.